More Lime Crime!

Standard

*Abby writing*

Hello guys!
I promised you I would get back to you with more Lime Crime!
So.. here I am, and also with the long-expected tutorial.
You can view it here:

My excuses for my bad english and video editing, lol! I’ll keep it to written tutorials in the future.
Anyway, hope you like it!

I’ve also swatched all of my lime crime colors.
My lipsticks so far:

1: Centrifuchsia, 2: Glamour 101, 3: Mint to be.

I have tried all three of them and I love them. Centrifuchsia is a lovely shade of bright pink and perfect for a more playful, springtime look (will get back to this in a later post). Glamour 101 is a very tricky shade to capture as it seems to look totally different in every photo. It’s indeed a brown based red. I love the colour though it’s a little bit too brownish to be the perfect ‘blood red’ that I’ve been looking for so badly. Nevertheless, I like it very much and I wear it nearly every day because it looks fabulous and seems to whiten my teeth. This is the only lipstick from Lime Crime that’s a bit translucent as well. That should explain why it appears to be a different colour to everyone.
I find Mint to be a very hard colour to wear as a lipstick though I love the striking appearance. I haven’t worn this in a daytime look yet but I’m planning to tomorrow. I think it’s going to look amazing with a dramatic smokey.
My boyfriends comments that he thinks I look like a mix between a mermaid and an alien when wearing this. Since I like weirdness that only seemed a compliment to me! Will post swatches of the first two on my lips later in this post.


These are the eye dusts that I got. 1: Shoe Addict, 2: Lime Criminal, 3: Empress, 4: Dragon Scales, 5: Abracadabra.
I have used all of them and my current favorite is Dragon Scales. I like unusual eye colours, that is why I love it so much. It’s a great colour for everyday wear, still very bright but also neutral looking because of the greenish shimmer. From a distance it looks like a neutral brownish colour while from up close it is fabulous! This is definitely a multi-purpose eyeshadow and I will be using it a LOT. It also goes great with Lime Criminal, as I will show you below.

I am going to do a small tutorial now on how to do an autumney look with Dragon Scales, Lime Criminal, Glamour 101 and Candy Apple. Hope you like it. 🙂

After applying a good base I just had to try out Candy Apple layered over Glamour 101. So I started with that, haha. This is what it looks like! I like to use my lipstick for a blush as well since I like them to match and it’s easy for me. How do you do that? Firstly apply a few dabs of Glamour 101 on your cheek like this and smudge it out alot so you will get the illusion of a blended blush. How much lipstick you put on your cheeks decides how pale or rich you want your blush to be.

This is what the blush looks like when smeared out over your cheek. Pretty neat, eh? I started with a smokey with Dragon Scales for this look. I applied it all over the eyelid and blended it. I can’t tell you how gorgeous this colour looks. I wish Lime Crime would bring out more duotoned eyeshadows!

After the Dragon Scales I apply some Lime Criminal to the inner corner of the eyelid and blend it outwards into the Dragon Scales, like this.

With an angled eyeliner brush I apply a small bit of Lime Criminal to the inner corner of my eye and blend it on my lower eyelid into Dragon Scales. It should look a little like this. Apply some Lime Criminal with an angled eyeliner brush into the inside of the lower eyelid (this means, with the Dragon Scales on the outside of the lower eyelid) for more depth.

Now apply the Lime Criminal above the eyelid and fade into Dragon Scales like this. This look is all about layering and when done in the right way it looks gorgeous!

This eyeliner swirl is my standard daily look. I’ve been doing this for five years without thinkingand it only takes me 30 seconds.. I’ll probably make a short movie later about how I do it because I can’t really explain this in words. I’ve also colored my eyebrows because they looked horrible and non-plucked and I like my eyebrows black ^^

Anyway, this is how I did the look and I hope you like it. A full-view picture:

I hope you liked it!!

Thanks for reading 🙂
My first internship photoshoot!

Standard

(written by Selma)

About 2 weeks ago, my teacher(Hilde Schuemie) arranged an internship with the Dutch photographer Danielle van der Spek.

Although it wasn’t the first time I tried to do the make-up for a photoshoot, I still had the nerves! Hilde kan be very strict/harsh with her commentary about the work you just did so I was hoping for the best. Not that the strict/harsh thing is a bad thing. As a creative teacher you just have to be straightforward to get the best out of every student!

My model was Jasmine, a beautifull girl/model with long hair. She was really patience and that made it very pleasent to work with her.
Her face was very fair and neutral toned so I could use white/neutral toned shades instead of yellow.

At first I really wanted to focus on the mouth, but halfway trough the putting on the eye make-up I decided to go for a different look.

What I used:

Eyes:

  • Make-upstudio eyeshadow 421 (neutral/skintone, I sometimes use this one for highlighting purposes)
  • Make-upstore microshadow deadly (dark/cooler brown)
  • Uban Decay naked (from the naked palette)
  • Make-up studio Eyebrow pencil classic nr 2
  • Make-up studio concealer palette

Face:

  • Kryolan ultra foundation Ivory
  • Kryolan ultra foundation TV White for highlighing
  • MAC Emphasize for highlighting
  • MAC Sculpt for shaping
  • MAC Mocha blush (this is one of my all time favorites!)
Lips:
  • Make-up studio Lipliner pencil nr 14
  • Make-up studio lipstick nr 53.
Brushes:
  • Beautyblender sponge (for foundation)
  • Make-up studio 1 (powder brush)
  • Make-up studio 2 (for highlight, shape and blush)
  • Make-up studio 14 (concealer brush)
  • MAC 235 (LE brush, I use it for highlighting with cream products)
  • MAC 239 (shadow brush)
  • Make-up studio 17 (shadow brush)
  • MAC 226 (LE blending brush, I also use this one for fixing powder on small area’s)
  • Make-up studio 24 (small blending blush)
  • Make-up studio 29 (small brush for details)
  • Make-up studio 28 (lip brush)
What I did:

I started with the basic things, plugging her eyebrows, cleaning her face and applying daycream. After that I got rid of the dark cirkles with some orange concealer and then I applied the foundation with my beautyblender and finished it with some concealer where needed.
For highlighting I used MAC 235 and applied the TV white foundation on the top of her cheekbones and the area between her eyebrows. After this I used fixing powder.
Then I shaped her face with MAC sculpt, (I used it at her hairline, for lifting up her cheekbones and for her cheek/neckline. (Maybe I will make a tutorial how to do this)
And I highlighted her cheekbones, forehead, under her eyebrows and parts of her nose.
For the eyes I made a classic eye by using the Make-up studio 421 on her eyelid.
I used Make-up store deadly in the crease and at the outerthird on her lid. I also used deadly under her lower lashline  and created and outer-v by connecting both.
I used Urban decay Naked to create a shadow on the side of her nose (from her eyebrow down following the curve of her nose) and to create a small shadow under her eye, for some extra dimension.
And I finished it with some mascara!
After this I applied some highlight on the top of her cheeks again and gave her some blush.
She did have a beautifull mouth of herself, and it was very hard to use a lipliner on her.
So me and my Hilde decided to keep it simple and used just a little lippencil for color and shape. And ofcourse some lipstick at the end!
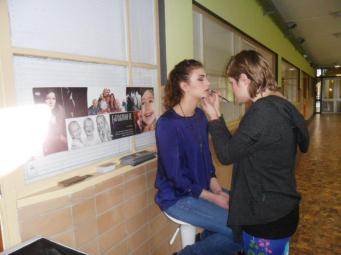
And a small backstage photo of me and Jasmine!
(I’m not very pleased with the way I look here, but yeah, deal with it)
Image
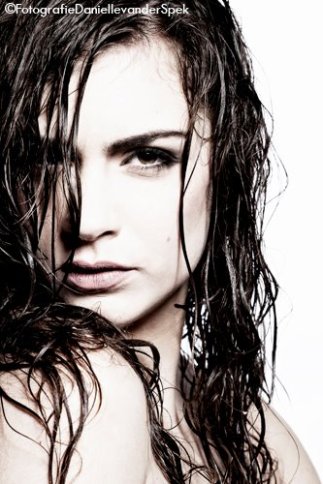
And ofcouse, the first result! I got it back the same evening, but only trough facebook. I am currently waiting for the other picture and the good version of this photo, but this is it!!:
Image
Hilde was very happy with this result and so am I!!   It is an amazing result for a first shooting experience  and I can definitely use this in my portfolio!


Model: Jasmine Heemskerk
Photographer: Danielle van der Spek
 

Kickoff :)

Standard

Hello folks, Abby here!

I’ve been wanting to write all week but now I finally have a little bit of time, haha! I am so busy!

I’ve made a couple of pictures last week so you guys can see my daily makeup looks, which are usually done very hasty and in a shaking bus on my way to work in the morning (my apologies for that) but I do like them.

Here’s a few pictures:

null
Sleepyhead

I also received my Lime Crime package in the mail last Thursday! Yay!
As you guys probably know I won the Lime Crime + MariMoon competition and got to pick $100 on lime crime products!
Lime criiiiiime
I purchased:
Eyeshadow Helper (primer)
(magic dusts:)
Shoe Addict
Empress
Abracadabra
Lime Criminal
Dragon Scales
(lipsticks:)
Glamour 101
Centrifuchsia

I already have Mint to be lipstick and the Candy Apple lipgloss. I absolutely adore the packaging, it is very unusual for high-quality makeup to have such colourful packaging. The packaging alone makes me squeel, let alone when I open it and see the colours inside.. wonderful!
Some pictures of my ‘stash’:

I was particularly curious about Dragon Scales, Glamour 101 and the primer so I tried them instantly.
Official swatch for Dragon Scales
Dragon Scales is a lovely and highly pigmented duotone dust in a shade of brick red with a green shimmer. When applied wet it really makes your eyes pop! I am certainly going to use it alot, it’s natural enough for a not too extreme daytime look but still very special and glamorous! Looks wonderful when combined with Lime Criminal, a bright sparkly lime green:

Official swatch for Glamour 101
I’ve been looking for a blood red lipstick for AGES. I don’t even know for how long. I read the mixed reviews on the website (about that it appears plummy in the swatch but actually is a brown-based red). Since the colour of blood is also brown based I was wondering: could this be the lipstick I have been looking for?
Well.. firstly when I opened it I instantly loved it. When I put it on it looked a tiiiny bit less bright than I had expected by looking at the swatch, but it’s still a beautiful red colour and worn under Candy Apple it’s the prettiest burlesque lippie someone could ever dream of. Certainly going to use this alot but the search for the perfect red still goes on for me.
Candy Eyed Eyeshadow Helper
The primer.. well, I don’t have words for it. It is absolutely perfect. I have greasy eyelids and usually my makeup doesn’t stay on very long. When I had to go to a large convention this weekend I put on my makeup in the morning at 8 AM and at 11 PM it looked almost just as pretty as when I put it on. If you looked more closely you could’ve seen some very slight creasing but I don’t mind because this primer seems to do the trick for me, for 15 whole hours! WOW! I am going to use this every single day from now on and I will keep praying that this’ll never ever go out of stock if I run out of it. Also the little sample that I received extra looks so unbelievably cute with the little bow! I use it if I have to go somewhere and don’t have much room in my bag.

This’ll be my blog entry for today. I finished my youtube tutorial for the unicorn look but it’ll be online tomorrow since it needs some time saving.